Knot tying is something that many have not learnt in school but it can be an important life saving skill if you are able to tie good knots in times of need.
There are more than 40 types of knots but not all are essential knots that every person may need to know, unless you're a climber or sailor.
Here at Share Share News Singapore, we recommend for practically that you only need to know three types of knots. That's right, three - thats all you rally need to learn. Learn how to do them and what they're good for, and the usefulness of these simple knot skills will make your life easier and may even save your life one day. So, if all you know is the overhand knot from having learned to tie your shoe laces as a kid, it's time for a brush-up on your skillset.
The Square Knot
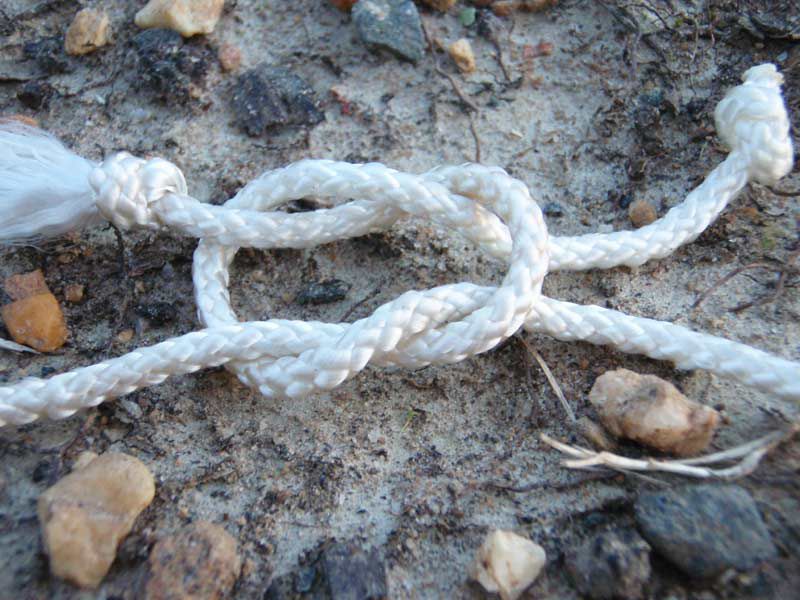
The square knot is a classic for connecting lines and tying knots. Whether you are tying two ropes together to make a longer rope, or you are tying up a bundle of firewood to carry, the square knot is a winner. It’s much more secure and stable than its cousin the granny knot, which everyone is probably familiar with as part of tying their shoes.
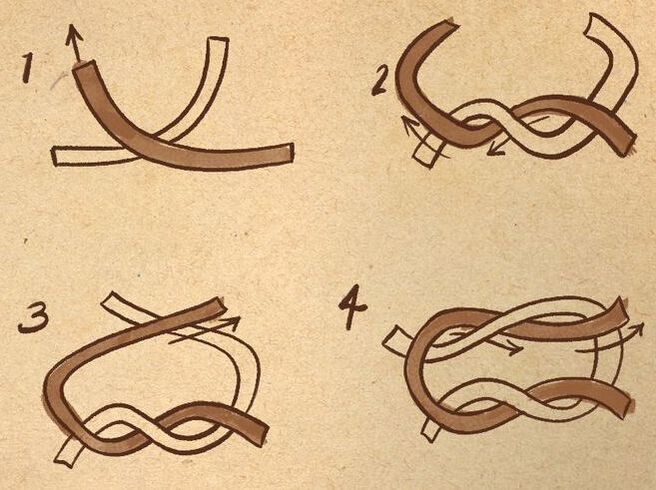
How to tie a square knot: You can tie a solid square knot by lapping one rope right over left, then underneath the other, and then tying the same again in the reverse direction—left over right and then underneath. You’ll know you did it right when the working end and standing end of each rope is side by side (not making a “cross” like a granny knot).
Switch to the square knot today and sidestep the inconvenience of loose laces or struggling to untie your double knots at the end of the day!
The Clove Hitch
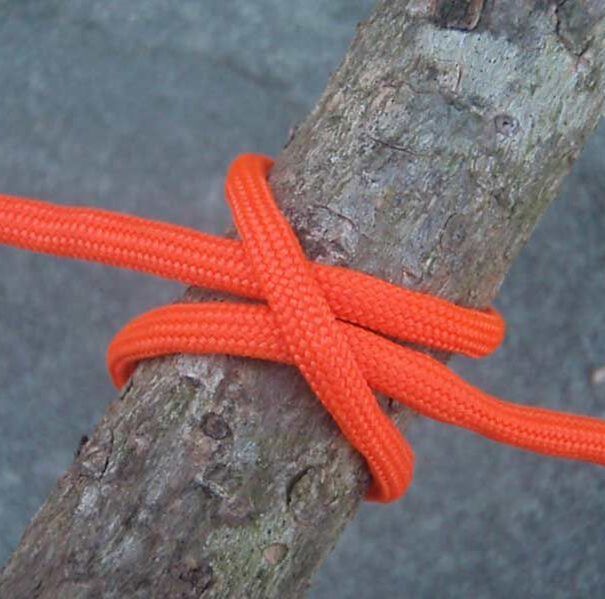
The clove hitch is an easy knot to tie, and it secures a line to a tree or post quickly, but it does slip when used alone, without any other knots as a backup.
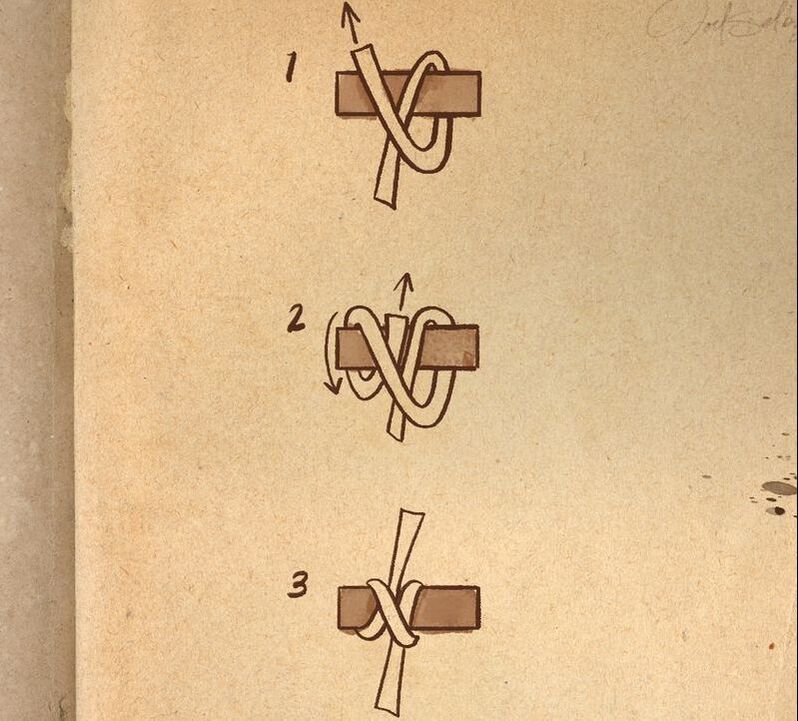
How to tie a Clove Hitch: To create a clove hitch on a tree, make a loop of rope around the tree. Then make another loop and pass the free end of the rope under the second loop before tightening. To tie this one over a post or stake, just create a loop in the free end of the rope and slide it over the post. Then make another loop the same as the first. Put the second loop over the post (just above the first loop) and tighten the hitch.
How to tie a Clove Hitch: To create a clove hitch on a tree, make a loop of rope around the tree. Then make another loop and pass the free end of the rope under the second loop before tightening. To tie this one over a post or stake, just create a loop in the free end of the rope and slide it over the post. Then make another loop the same as the first. Put the second loop over the post (just above the first loop) and tighten the hitch.
The Bowline
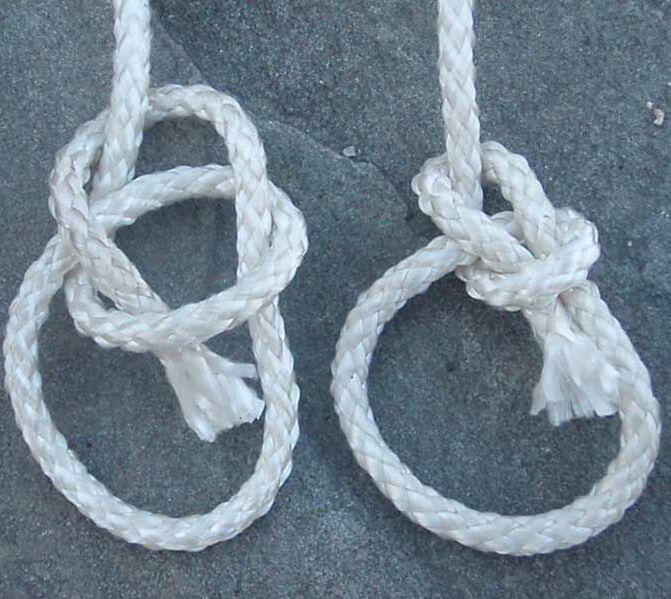
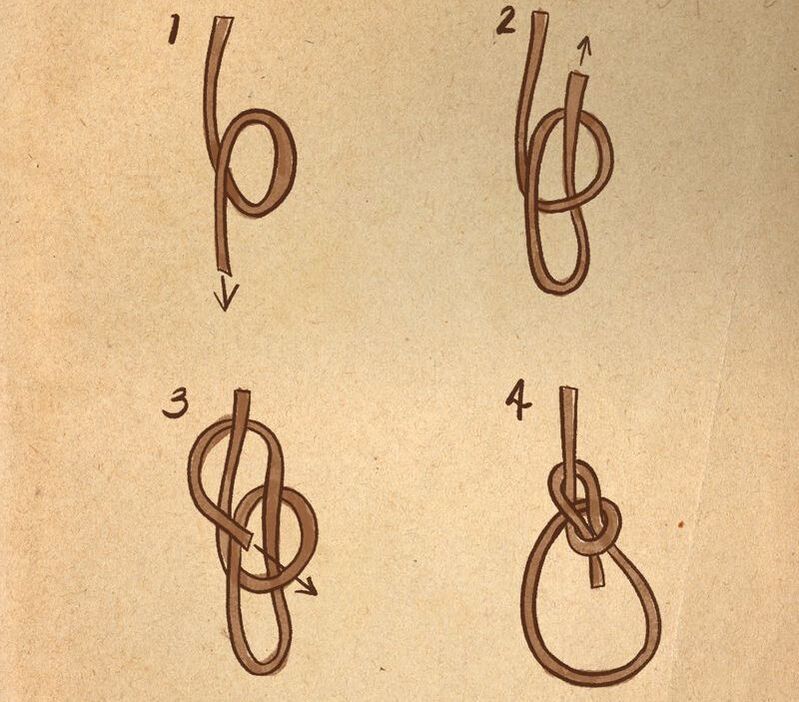
The bowline creates a loop at the end of a rope that cannot shrink or expand. This knot is often taught and illustrated with a poem of a rabbit coming out of the hole, hopping in front of a tree, going behind the tree, and back down his original hole.
How to tie a Bowline: form a loop on top of the long end of the line. Pass the working end of the line up through the loop and around behind the line. Then pass the working end down through the original loop, all while maintaining the shape of the second loop you create, which becomes your bowline loop. Once the “rabbit” is back down its hole, pull the “tree” up to tighten the bowline. - Tim MacWelch / Outdoor Life
How to tie a Bowline: form a loop on top of the long end of the line. Pass the working end of the line up through the loop and around behind the line. Then pass the working end down through the original loop, all while maintaining the shape of the second loop you create, which becomes your bowline loop. Once the “rabbit” is back down its hole, pull the “tree” up to tighten the bowline. - Tim MacWelch / Outdoor Life


 RSS Feed
